[Android]안드로이드 스튜디오 BUTTON LISTNER 버튼과 리스너
- 코딩/Android
- 2020. 3. 23.
안드로이드 스튜디오 BUTTON LISTNER 버튼과 리스너
XML 파일에는 안드로이드 화면에 출력될 텍스트나 이미지 버튼 등 보여질 것들을 코딩하고
JAVA 파일에는 그 파일들을 어떻게 작동시킬지 코딩하는 것 같다.
먼저 XML파일
<?xml version="1.0" encoding="utf-8"?>
<LinearLayout
xmlns:android="http://schemas.android.com/apk/res/android"
android:layout_width="match_parent"
android:layout_height="match_parent"
android:orientation="vertical"
android:gravity="center"
>

<TextView
android:id="@+id/textView"
android:layout_width="wrap_content"
android:layout_height="wrap_content"
android:text="Hello World!"
android:textColor="#000000"
android:textSize="28dp"
/>


<Button
android:id="@+id/button"
android:layout_width="wrap_content"
android:layout_height="wrap_content"
android:text="Good Bye button"
/>

/>
<Button
android:id="@+id/button1"
android:layout_width="wrap_content"
android:layout_height="wrap_content"
android:text="HOLA button"
/>
</LinearLayout>
JAVA 파일
package com.example.a61; //만약에 복사해서 붙여넣기 해서 테스트 해볼꺼라면 이부분을 수정해야한다.

import android.support.v7.app.AppCompatActivity;
import android.os.Bundle; //액티비티 생성 번들
import android.view.View; //뷰계열 최상위 클래스
import android.widget.Button; //버튼 뷰 사용
import android.widget.TextView;

import org.w3c.dom.Text;

public class MainActivity extends AppCompatActivity { // 메인화면

	private TextView textView;

	@Override // 부모 메소드 재정의
	protected void onCreate(Bundle savedInstanceState) { // 화면생성 이벤트
		super.onCreate(savedInstanceState); // 부모 생성자 호출
		setContentView(R.layout.activity_main); // 메인 화면 표시

		textView = findViewById(R.id.textView); // 여기에 밑에 값을 넣음

		Button button = findViewById(R.id.button); // 밑에 4줄에서 GOOD BYE를 BUTTON에 넣는다.
		button.setOnClickListener(new View.OnClickListener() { // 클릭 리스너 생성 (클릭했을때의 동작)
			@Override
			public void onClick(View v) {
				textView.setText("Good Bye~");

			}
		});

		Button button1 = findViewById(R.id.button1); // 밑에 4줄에서 Halo를 BUTTON1에 넣는다.

		button1.setOnClickListener(new View.OnClickListener() {
			@Override
			public void onClick(View v) {
				textView.setText("Halo");
			}
		});
	}
}
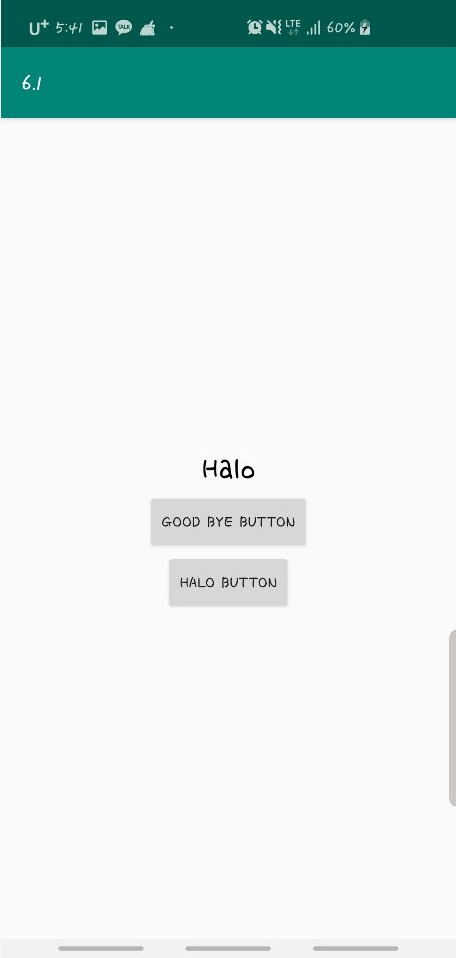
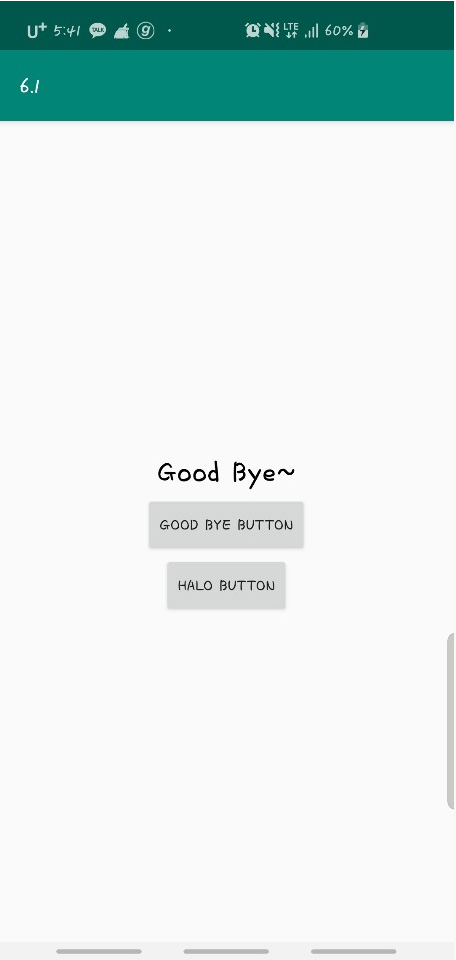
간단하게 설명을 하자면 xml에 두개의 버튼을 만든다.
java에서 각각 버튼에 클릭리스너 (클릭했을때 실행)를 만들고 textviw를 넣어준다.
실행 이미지


'코딩 > Android' 카테고리의 다른 글
| [Android] 타이틀 제목 없애기 (0) | 2020.03.25 |
|---|---|
| [Android]안드로이드 스튜디오 image(이미지) 출력해보기 (0) | 2020.03.24 |
| [Android]안드로이드 스튜디오Layout(레이아웃) 나누기 (0) | 2020.03.22 |
| [Android]안드로이드 스튜디오 TextView constraint (0) | 2020.03.21 |
| [Android]안드로이드 스튜디오 TextView (텍스트뷰) 사용하기 (0) | 2020.03.20 |